

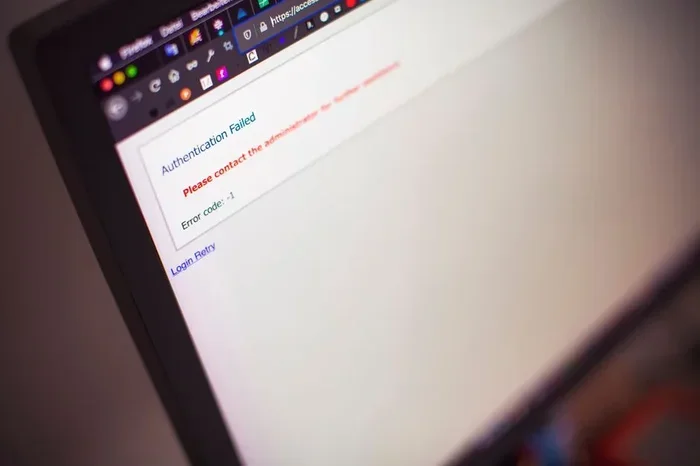
Formatting a password protected laptop might feel intimidating, but it is entirely doable with the right method. You can use Windows Recovery, a bootable USB drive, or the Command Prompt to wipe your drive and start fresh. This guide walks you through every method in simple, easy-to-follow steps so you can format a password protected laptop with confidence.
Formatting a password protected laptop is something many people need to do at some point. Maybe you are selling your device, fixing a stubborn software issue, or simply want a fresh start. Whatever the reason, the process is more straightforward than you might think.
When your laptop asks for a login password every time you turn it on, it can feel like a wall between you and a clean system. But do not worry. There are several reliable ways to get past that password and format your hard drive. This guide covers every practical method so you can choose the one that works best for your situation.
In this article, you will learn how to back up your data, access the Windows Recovery Environment, create a bootable USB drive, and use the Command Prompt for advanced formatting. Each method is explained in plain language with clear steps you can follow right away.
Key Takeaways
- Multiple Methods Available: You can format through Windows Recovery, a bootable USB, or Command Prompt depending on your situation.
- Back Up Data First: Always try to save important files before formatting, even on a password protected device.
- Recovery Environment Is Your Friend: The Windows Recovery Environment lets you access formatting tools without needing the login password.
- Bootable USB Works Everywhere: A USB with Windows installation media bypasses the password entirely and gives you a clean install.
- Post-Format Setup Matters: After formatting, reinstalling drivers and updates ensures your laptop runs smoothly and securely.
📑 Table of Contents
- Why You Might Need to Format a Password Protected Laptop
- What You Should Do Before Formatting
- How to Format a Laptop That Is Password Protected Using Windows Recovery
- Formatting with a Bootable USB Drive
- Using Command Prompt to Format
- What to Do After Formatting Your Laptop
- Common Mistakes to Avoid
- Conclusion
Why You Might Need to Format a Password Protected Laptop
There are many valid reasons to format a laptop that is password protected. Understanding your situation helps you pick the right method. Here are the most common scenarios:
- Selling or Donating the Laptop: You want to erase all personal data before handing the device to someone else.
- Fixing Serious Software Problems: Your laptop has persistent viruses, crashes, or corrupted files that normal fixes cannot resolve.
- Forgotten Login Password: You cannot remember your password and need to start over with a clean installation.
- Preparing for a Fresh Operating System: You want to reinstall Windows or switch to a different version without any leftover files.
- Removing Previous Owner Data: You bought a used laptop and want to wipe everything before setting it up as your own.
No matter which reason applies to you, formatting removes everything on your hard drive. This includes the operating system, applications, and all stored files. That is why backing up important data comes first.
Common Situations That Call for Formatting
Sometimes the need to format is urgent. A laptop infected with ransomware or heavy malware may need a complete wipe. Other times, a slow or glitchy system benefits from a clean factory reset. In all these cases, you do not need to know the administrator password to format the device.
What You Should Do Before Formatting
Before you begin, take a few minutes to prepare. Proper preparation saves time and prevents data loss.
Back Up Your Important Files
If you can still access your files through another user account or a safe mode connection, copy them to an external drive or cloud storage. Even on a password protected laptop, you might be able to access files from the safe mode environment or by booting from another operating system.
Gather What You Need
Here is a quick checklist of items to have ready:
- A USB flash drive with at least 8 GB of storage
- Another computer to create a bootable USB
- Your Windows product key (if you have one)
- A stable power source or charged battery
- Internet access for downloading drivers after formatting
Having these items ready makes the entire process smoother. You will not have to pause midway to find something you need.
How to Format a Laptop That Is Password Protected Using Windows Recovery
The Windows Recovery Environment is a built-in tool that lets you access formatting options without entering your password. This is often the easiest method for most users.
Accessing the Recovery Environment
To get started, follow these steps:
- Force your laptop to shut down by holding the power button for 10 seconds.
- Turn it back on and wait for the manufacturer logo to appear.
- Force shutdown again by holding the power button for 10 seconds.
- Repeat this process three times total. On the fourth boot, the Windows Recovery Environment should appear automatically.
This trick works on most Windows 10 and Windows 11 laptops. Once you are in the recovery menu, navigate to Troubleshoot and then Reset this PC.
Step-by-Step Formatting Process
Once in the recovery menu, you have two options. Choose Remove Everything if you want to fully wipe the laptop. Choose Keep My Files if you only want to reset settings and apps. For a complete drive cleanup, select Remove Everything, then select Cloud Download or Local Reinstall. Follow the on-screen prompts, and your laptop will format and reinstall Windows automatically.
This method is simple and does not require any external tools. It works well when the laptop still boots, even if you cannot log in.
Formatting with a Bootable USB Drive
Creating a bootable USB drive is one of the most reliable ways to format a password protected laptop. This method completely bypasses the login screen and gives you full control over the formatting process.
Creating a Bootable USB
Use another computer to create the bootable drive. Download the Windows installation media from Microsoft’s official website. Use a tool like the Media Creation Tool to write the Windows image to your USB drive. Once the USB is ready, plug it into the password protected laptop.
Installing Windows Fresh
Restart the laptop and press the boot menu key during startup. This key varies by manufacturer, but common options include F12, F2, F9, or Esc. Select the USB drive as the boot device. The Windows setup screen will appear. Choose your language, click Install Now, and then select Custom Install. You will see all available drives. Select the main drive and click Format. This wipes the drive completely and installs a fresh copy of Windows.
This method is especially useful when the recovery environment does not work or when you want complete control over the installation.
Using Command Prompt to Format
For advanced users, the Command Prompt offers a powerful way to format a laptop from the recovery environment. This method gives you precise control over which drive gets formatted.
The Diskpart Method
From the Windows Recovery Environment, go to Troubleshoot and then Advanced Options. Select Command Prompt. Type the following commands one at a time, pressing Enter after each:
- diskpart — opens the disk partitioning tool
- list disk — shows all connected drives
- select disk 0 — selects your main drive
- clean — removes all partitions from the drive
- create partition primary — creates a new partition
- format fs=ntfs quick — formats the drive quickly
- exit — closes diskpart
After running these commands, close the Command Prompt and restart. You can then proceed with a fresh Windows installation. This method performs a thorough secure erase of your drive and is very effective for laptop reset purposes.
What to Do After Formatting Your Laptop
Formatting is only half the process. After your laptop restarts with a fresh installation, there are a few important steps to complete.
Reinstalling Drivers and Updates
Windows Update will handle most drivers automatically, but it is a good idea to visit your laptop manufacturer’s website and download the latest drivers for your specific model. This includes graphics drivers, audio drivers, and chipset updates.
Setting Up Your Laptop Again
Create a new user account with a strong password you can remember. Consider setting up a password reset disk or linking your account to a Microsoft account for easier recovery in the future. Install your essential applications and restore your backed-up files.
Common Mistakes to Avoid
Formatting a password protected laptop comes with a few pitfalls. Here are mistakes to avoid:
- Forgetting to Back Up Data: Formatting erases everything permanently. Always double-check that your important files are saved elsewhere.
- Formatting the Wrong Drive: In Diskpart or during setup, make sure you select the correct drive. Formatting the wrong drive can cause serious data loss.
- Skipping Driver Updates: A fresh install without updated drivers can lead to performance issues and hardware problems.
- Using Unofficial Tools: Stick to official Microsoft tools and trusted sources. Third-party formatting tools can introduce malware or corrupt your system.
- Ignoring BitLocker: If your laptop has BitLocker encryption enabled, you will need the recovery key before formatting. Without it, your data may become permanently inaccessible.
Avoiding these mistakes ensures your formatting process goes smoothly and your laptop performs well after the reset.
Conclusion
Formatting a password protected laptop is easier than most people think. Whether you use the Windows Recovery Environment, a bootable USB drive, or the Command Prompt, each method gets the job done effectively. The key is to prepare properly, choose the right method for your situation, and follow the steps carefully.
Always remember to back up your data first, avoid common mistakes, and set up your laptop properly after formatting. With the right approach, you can breathe new life into any password protected laptop and have it running like new in no time.
Frequently Asked Questions
Can I format a laptop without knowing the password?
Yes, absolutely. You can access the Windows Recovery Environment by forcing shutdowns during boot, or you can use a bootable USB drive to bypass the login screen entirely. Neither method requires the current password.
Will formatting remove the password from my laptop?
Yes. Formatting wipes the entire hard drive, which includes the user profile, login credentials, and all associated data. After formatting and reinstalling Windows, you will set up a brand new account with a new password.
How long does it take to format a laptop?
The formatting process itself usually takes 15 to 30 minutes. However, if you are also reinstalling Windows, the entire process can take one to two hours depending on your laptop’s speed and internet connection.
Do I need a product key to format and reinstall Windows?
Not always. Windows 10 and Windows 11 are linked to your device’s hardware, so if you previously activated Windows on that laptop, it should reactivate automatically after a fresh install. You can check your product key using the Command Prompt if needed.
Is it safe to format a laptop that has BitLocker enabled?
It is safe, but you must have the BitLocker recovery key. Without it, formatting a BitLocker-protected drive can make your data permanently unrecoverable. Save the recovery key to your Microsoft account or a USB drive before starting.
What is the difference between formatting and a factory reset?
A factory reset reinstalls Windows and removes apps but may keep some system files. Formatting completely wipes the hard drive and gives you a blank slate. For the most thorough clean, formatting is the better choice.